Here is the basic process I use when making my drawings. While I compiled this guide a number of years ago, it is essentially the same process I continue to use with minor modifications. Note that this is more of an overview than a basic how-to guide, so specific techniques are not addressed.
It is my intention to release more information of my process, possibly using video, in the future. For now, I will continue to post work-in-progress pictures on my facebook page. My work continues to grow and change as I attempt different techniques and am exposed to more of the works of others.
Thank you very much for your interest in my work!

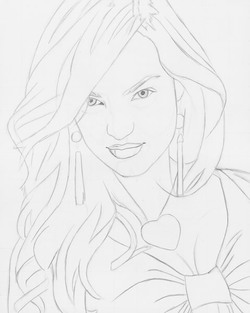
Step 1: Using a semi-hard pencil, a grid has been lightly drawn to assist in the initial contour which has been laid down with a fairly dark line, so that it is still visible in the later steps.
Time: 1.5 hours
Tools used: ruler, 2H pencil (for the grid), F pencil (for the contour)

Step 2: Using a soft pencil, a generalized foundation of the drawing has been shaded in. No detailing is required at this stage as much of it would be lost in the following stages.
Time: 30 minutes
Tools used: 3B pencil
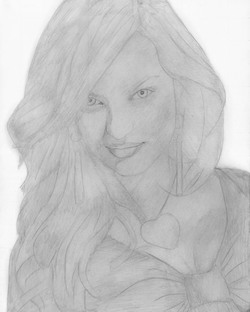
Step 3: This stage simply broadly blends what has been drawn in the previous stage.
Time: 15 minutes
Tools used: Q-tips, tissue
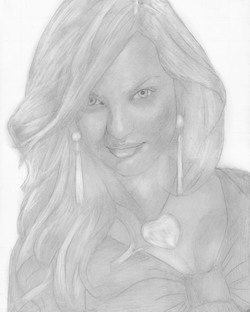
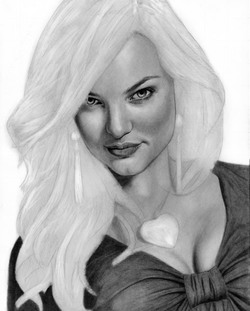
Step 4: The first modeling has been begun by pulling out some highlights.
Time: 15 minutes
Tools used: kneaded eraser, chamois
Step 5: Now the real drawing begins! Using a variety of pencils, the skin and face have been shaded and blended in. The darks established here will be used as reference for the value scheme of the rest of the drawing, which is a great reason to start with the eyes as they are filled with such a wide tonal range.
Time: 3.5 hours
Tools used: B-3B pencils, Q-tips, tissue, chamois, tortillon, kneaded eraser
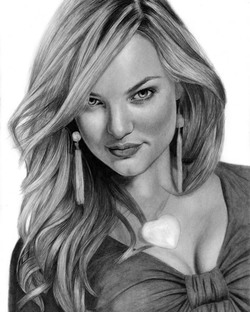
Step 6: Seeing the drawing in layers and working back-to-front, the clothing is the next object to be drawn in.
Time: 1.5 hours
Tools used: B-3B pencils, Q-tips, tissue, chamois, kneaded eraser
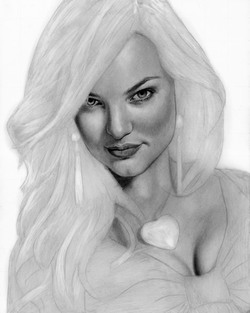
Step 7: This stage is dedicated solely to the modeling and texturing of the hair, which rests upon all that has been previously drawn. The hair is seen as abstract, free-flowing sections which connect to each other rather than a mass of individual strands.
Time: 3 hours
Tools used: 2H-3B pencils, Q-tips, tissue, tortillon, kneaded eraser
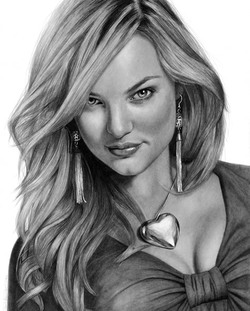
Step 8: The final details are drawn as well as an overall “polishing” of the drawing, i.e. edges get more defined, the remainder of the grid gets erased, additional shadows are established where needed, darks become redefined, loose hair strands are drawn, small highlights are drawn in with a gel pen and/or erased, etc.
Time: 30 minutes
Tools used: B-3B pencils, Q-tips, tissue, chamois, tortillon, kneaded eraser, retractable eraser (if necessary), white gel pen
Total drawing time: roughly 11 hours, over 4 days